
Small Bathroom / Powder Room Makeover!

We moved into our new home almost a year ago and I finally got around to re-doing the small powder room on our main level. It took me awhile to get to it, because I spent quite a bit of time deciding on a primary paint color for our home. Once that was taken care of, all I did was find a shade within the same family for our bathroom. Picking out the right paint color for your home is a job!
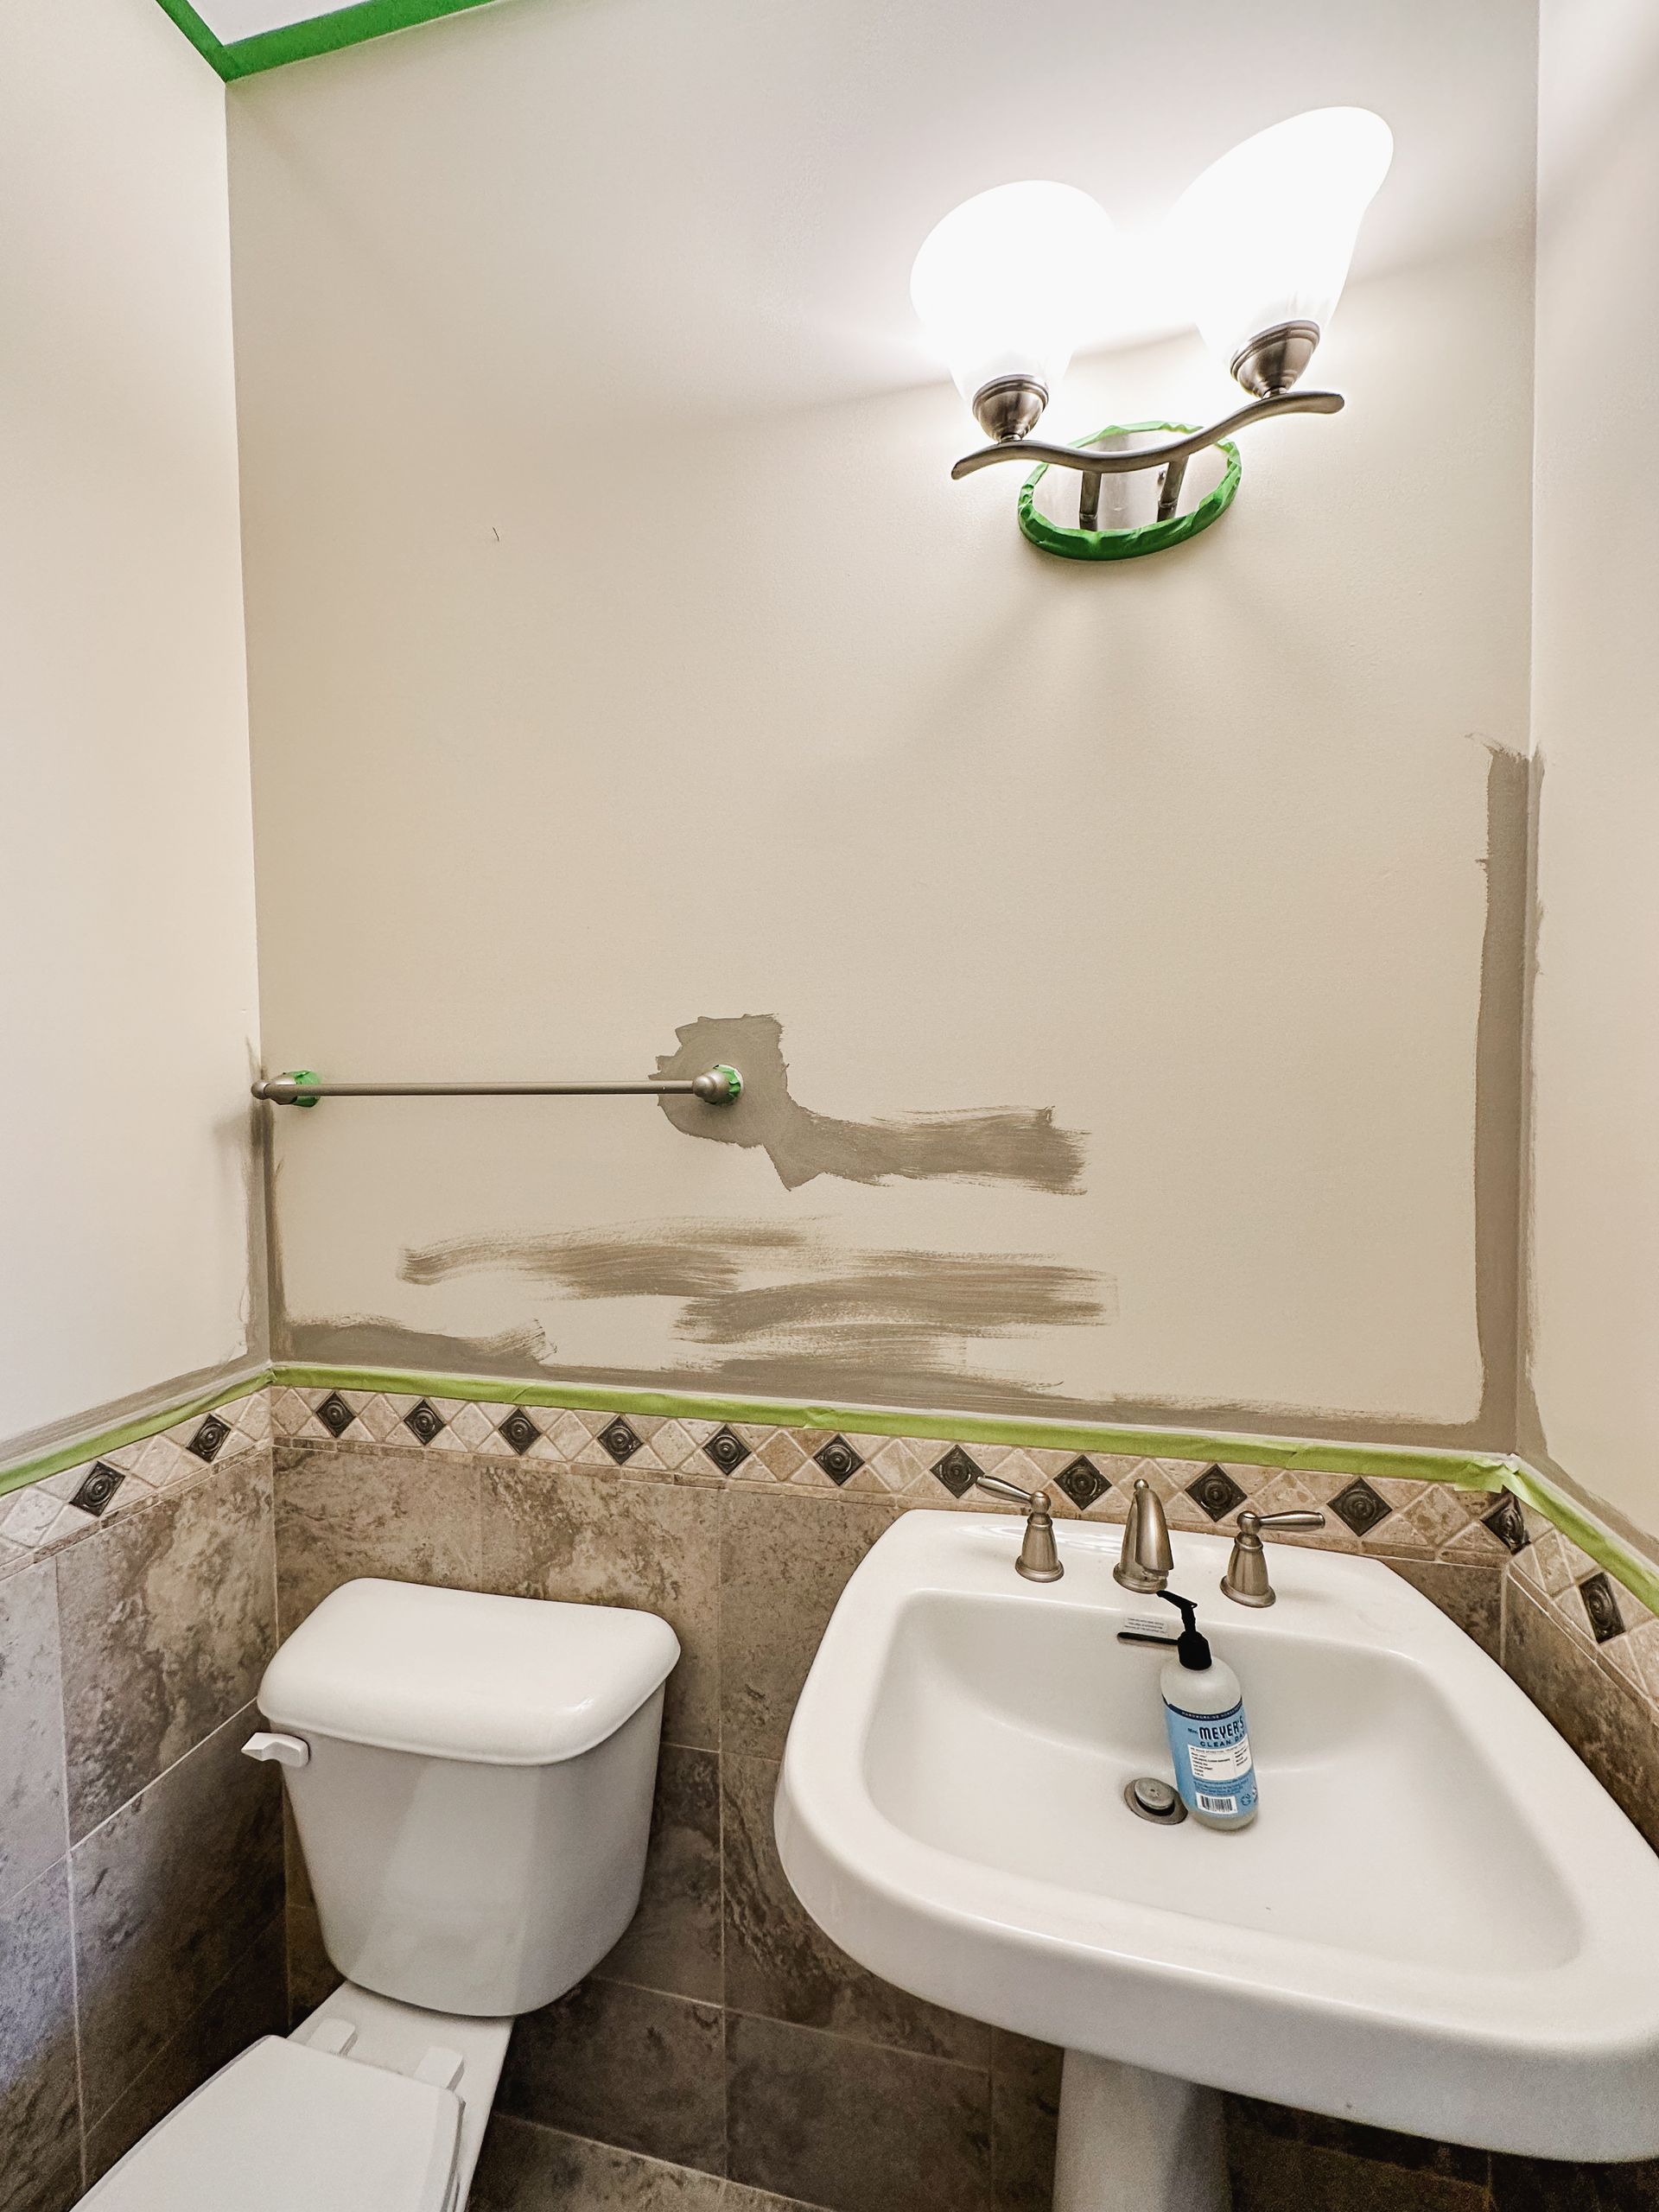
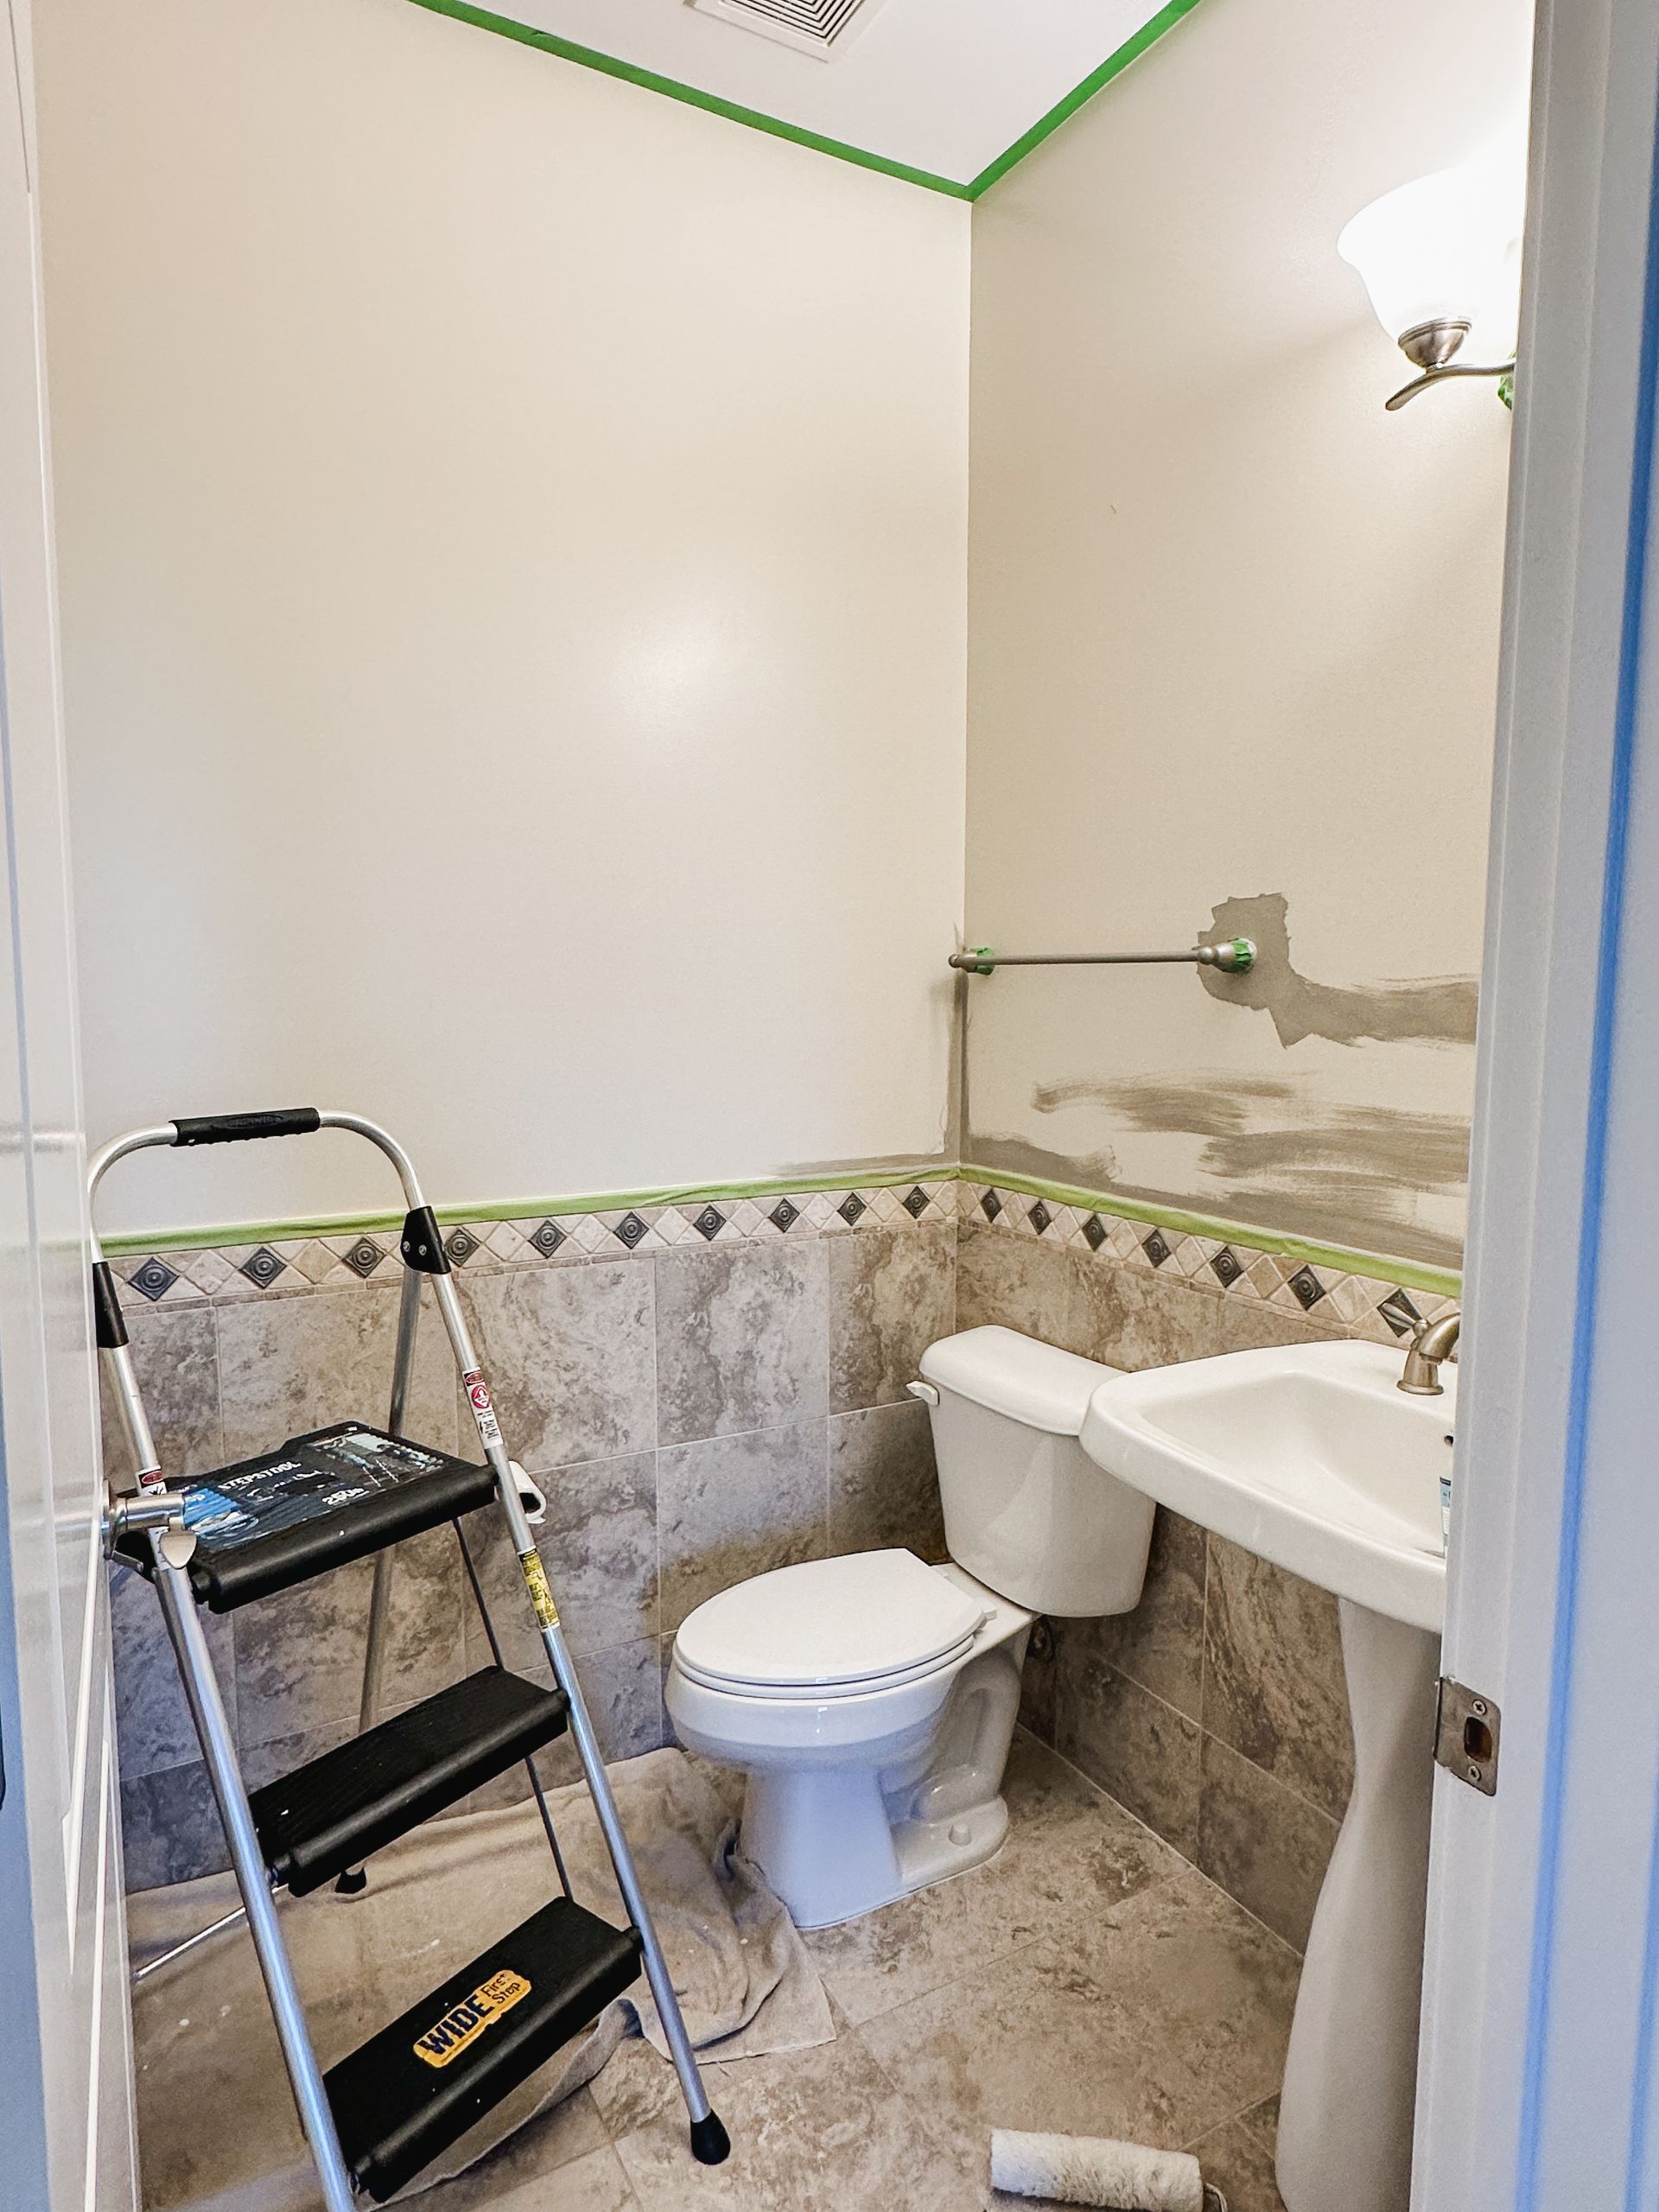
But first things first, this is the canvas we started with...
Before
Choosing A Color
For our main level, we waffled between Repose gray and Agreeable gray - moving both colors around different rooms to see how the light would hit it. In the end, Repose was the winner!
Because we used SW Repose gray for the main color of our home, we stuck with the same color family and went 2 shades up for the powder room to Dorian gray to get the look we wanted. When we moved in the paint was a very yellow color, and we wanted something to make the gray tiles pop in the bathroom, not to mention update the entire look of our house by getting rid of yellow.


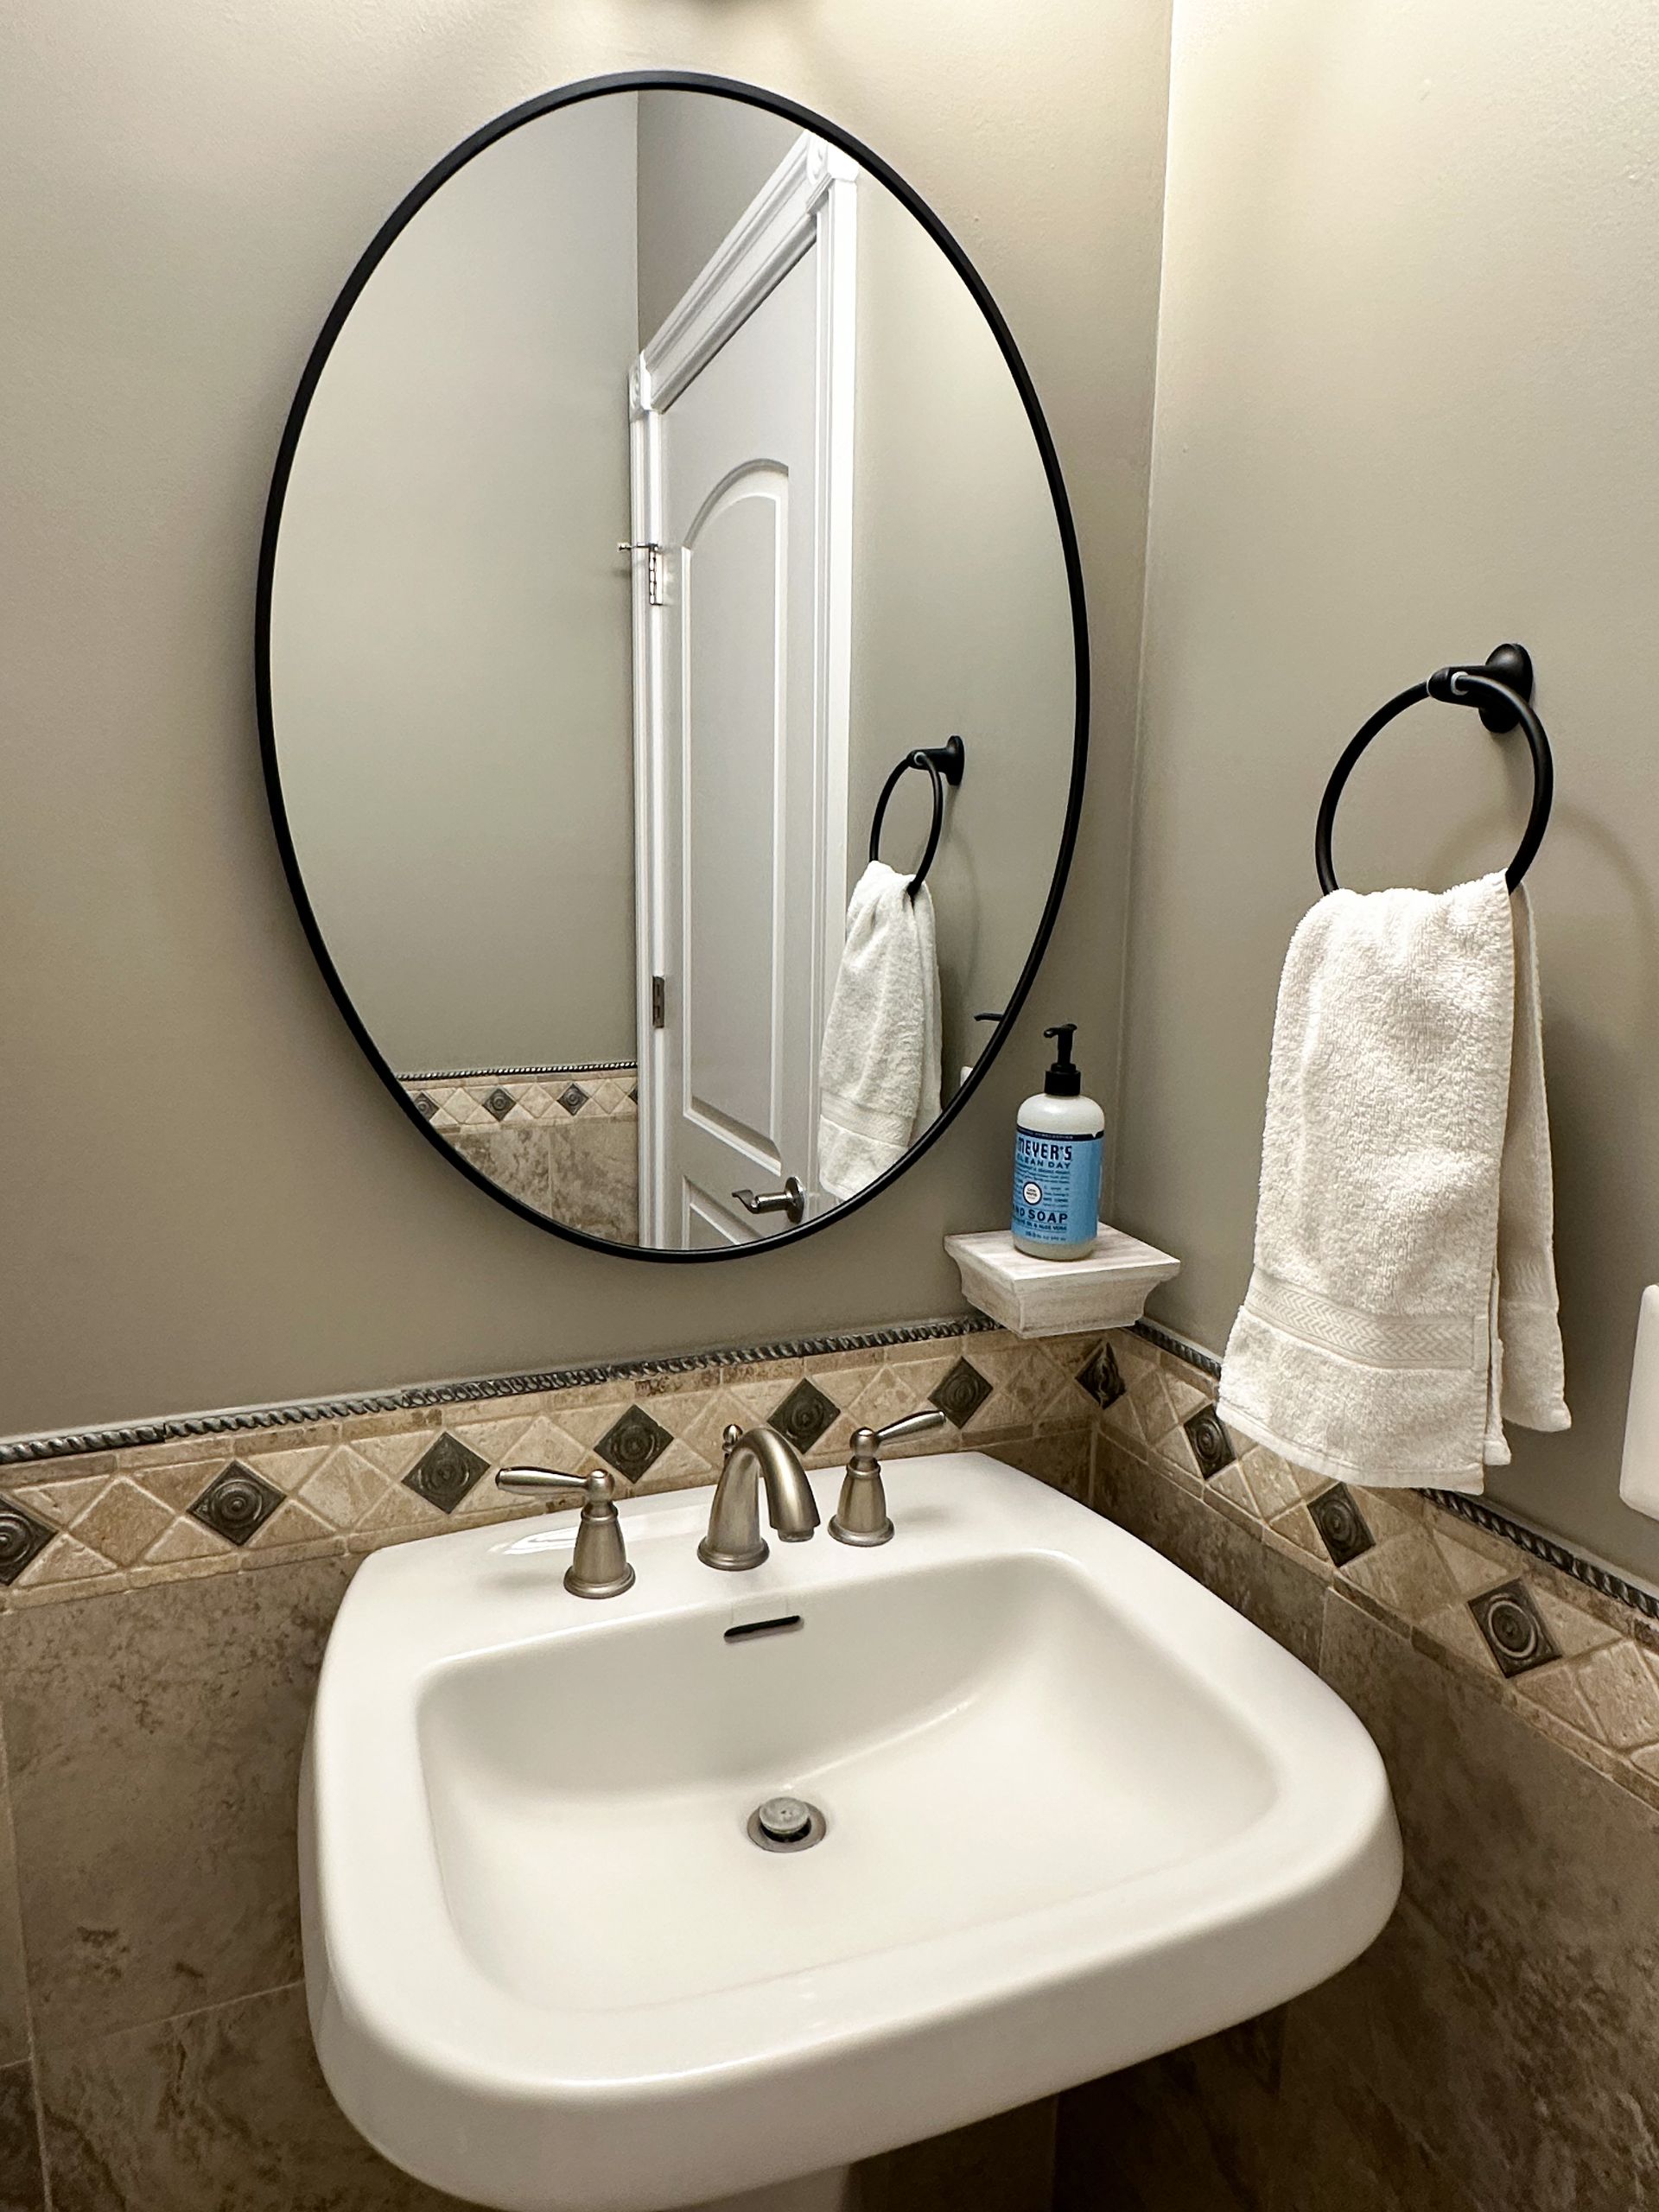
I started by painting everything, and it took me just a few hours to get 2 coats painted with some drying time in between each coat. We picked out a mirror for the bathroom (when we moved in there wasn't one!) and my husband hung it for me.
I debated between two different mirrors at the store. In the end, I went with a very classic oval mirror with a thin black frame, and that choice informed the rest of the decor I added to the small space. I wasn't sure on a farmhouse distressed white mirror or the black, but I'm so glad I went with the black in the end!
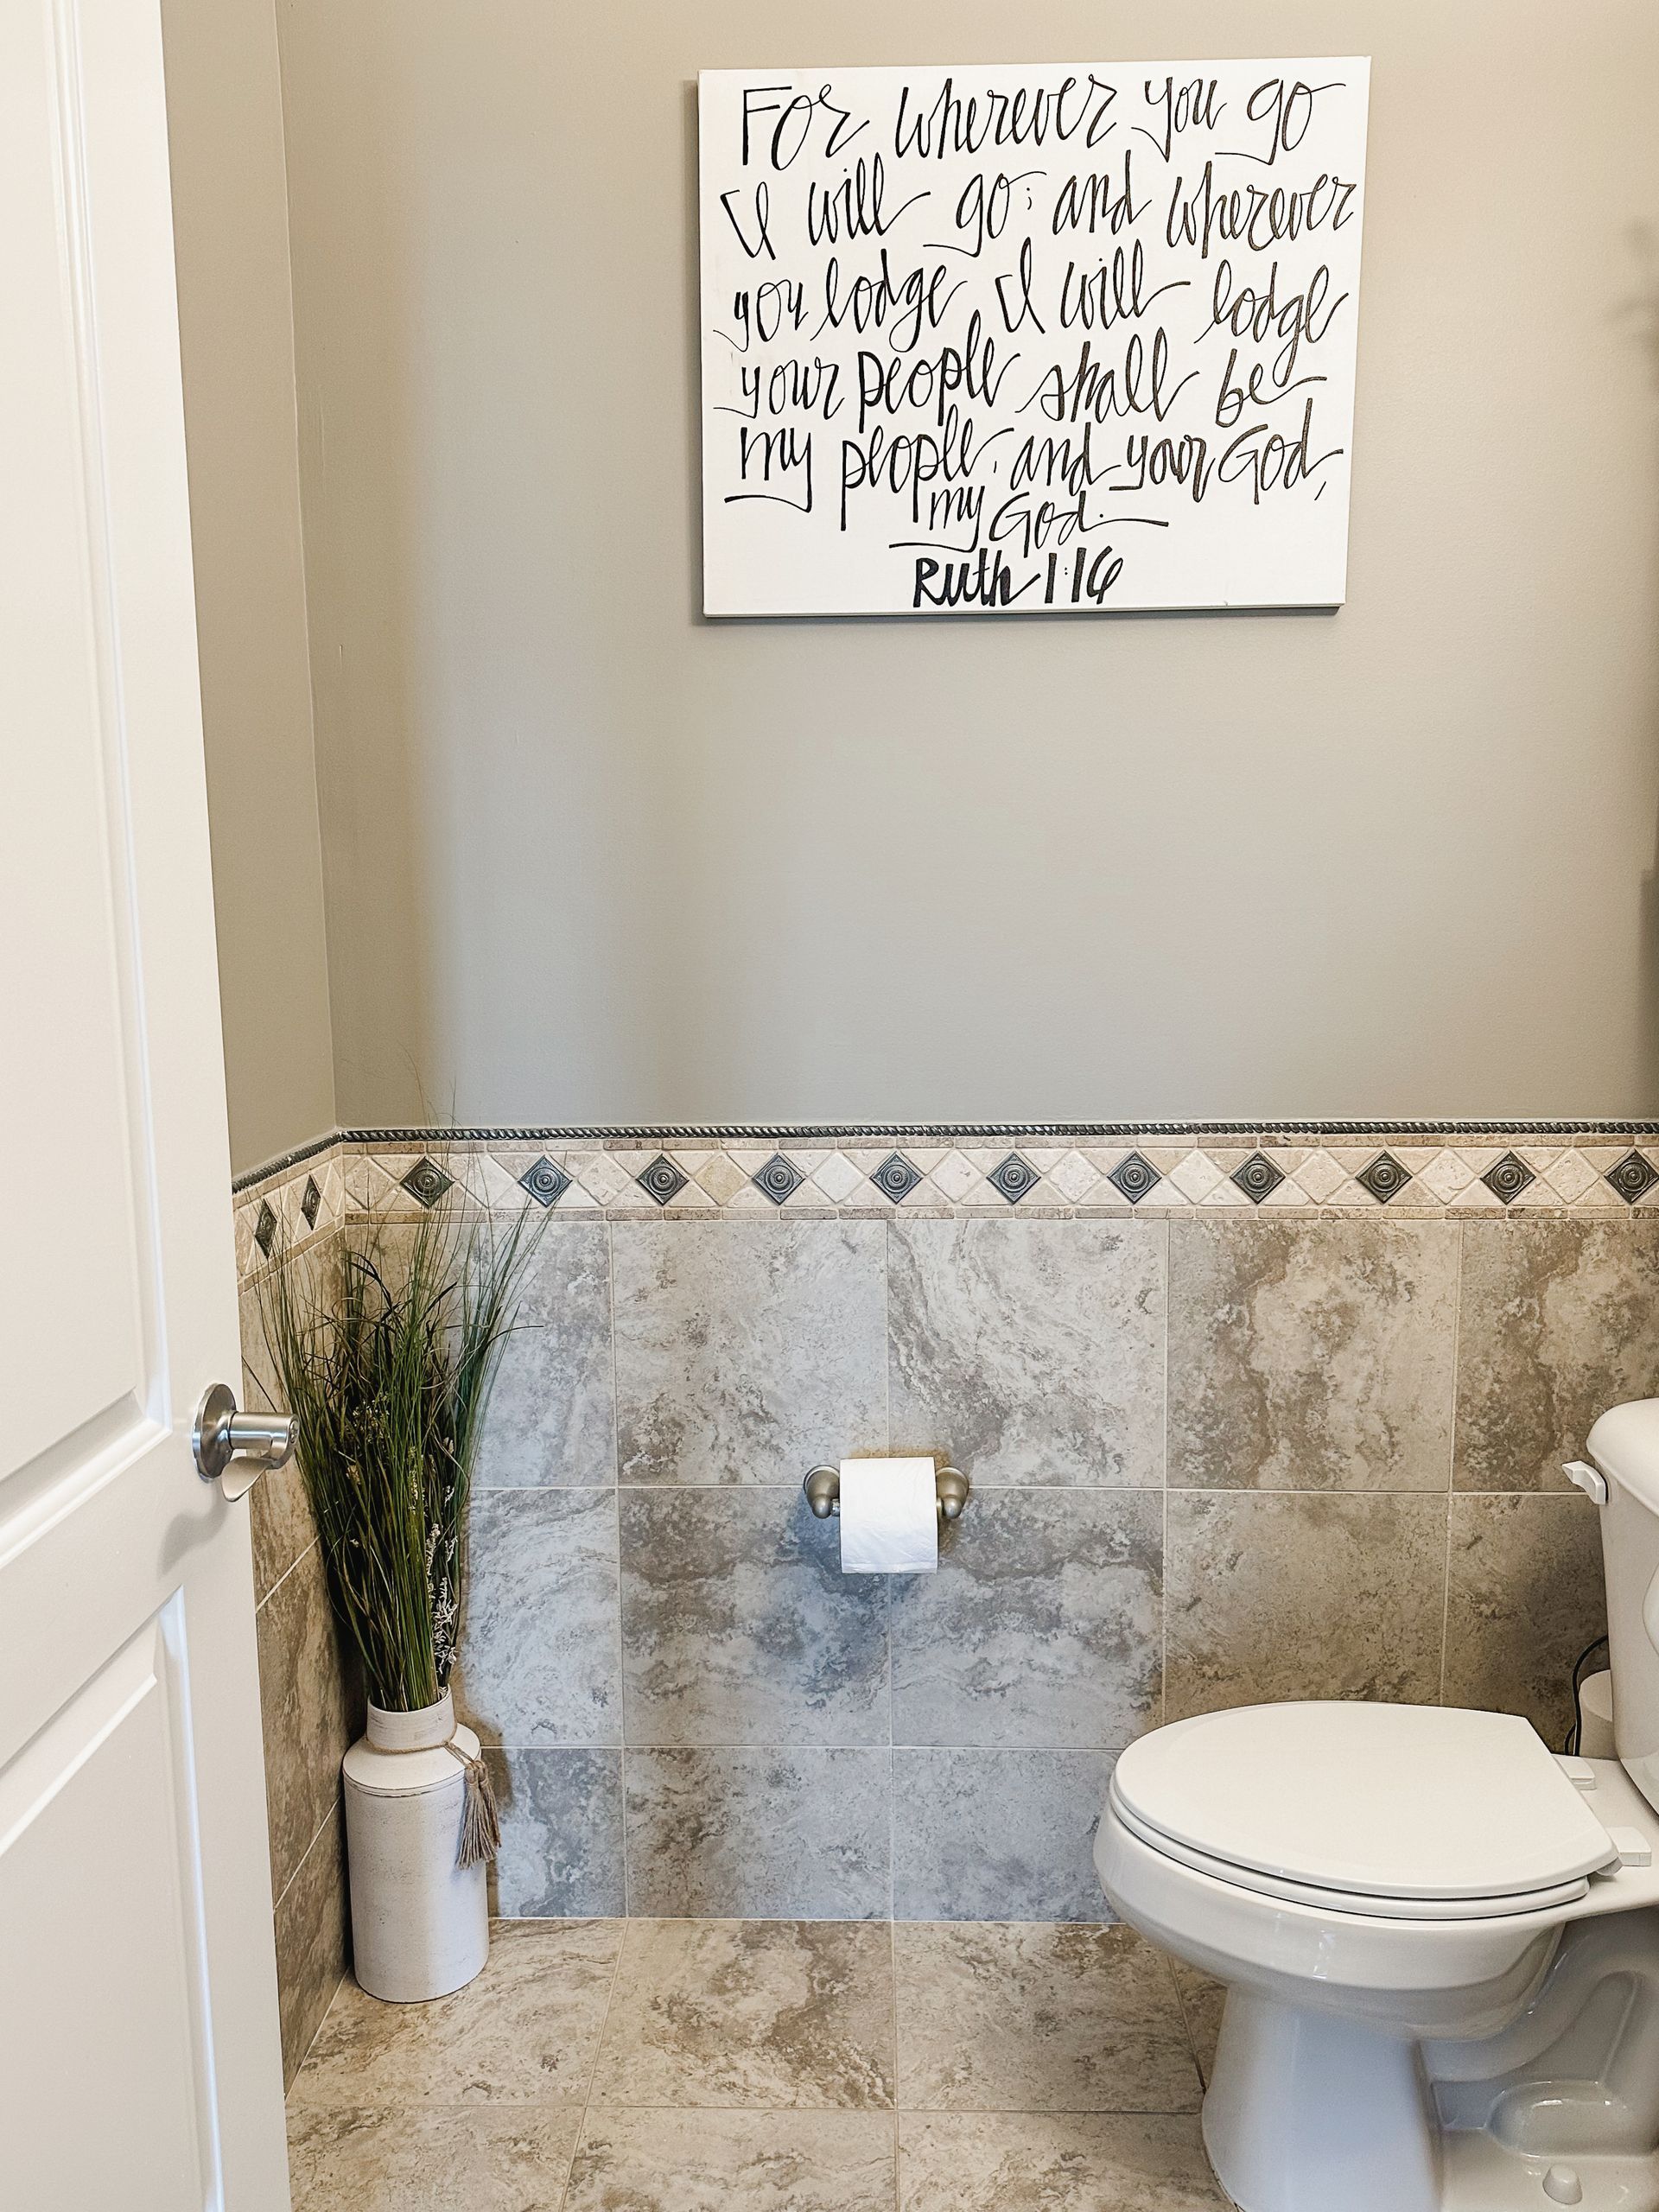
The first thing I knew we wanted to change was the towel rack that was above our toilet, and to find something that matched the mirror. We found this black towel rack at Walmart. It's perfect. And inexpensive.
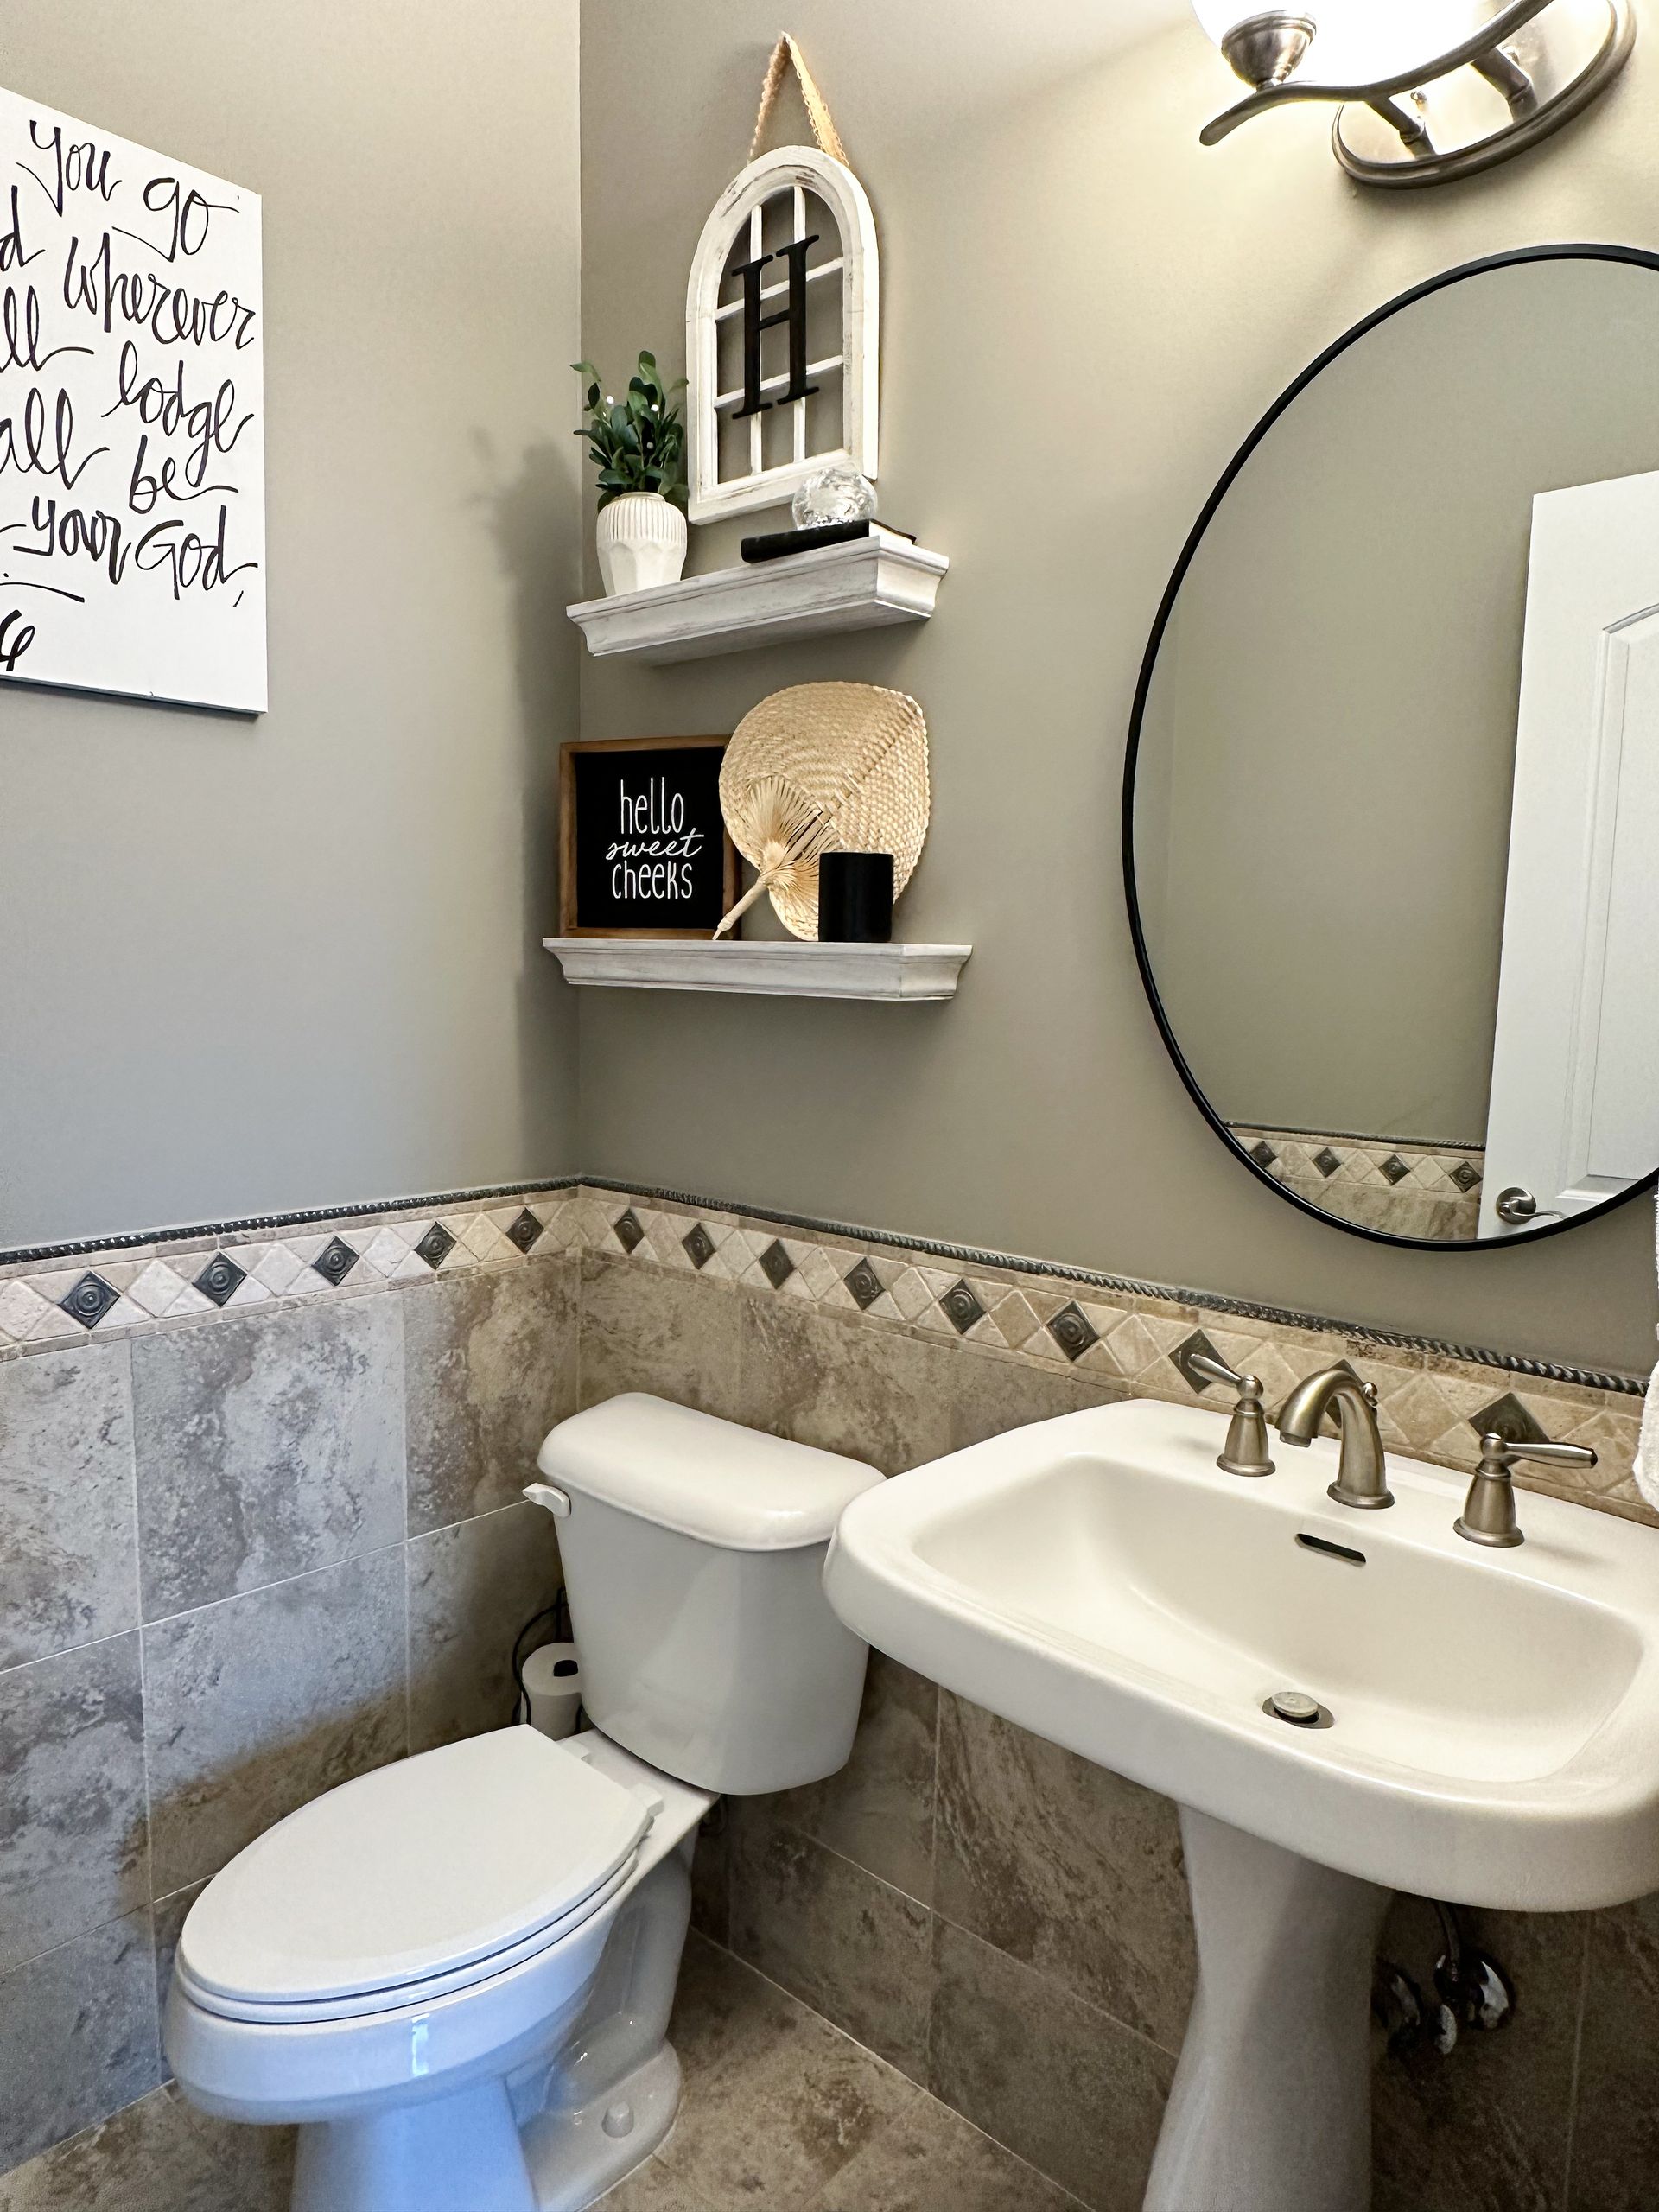
The second thing we needed to figure out is where to put our soap dispenser. The bathroom sink doesn't have any vanity space to fit the soap, and for a year I've had the soap wedged between the cold water handle and the spout! Not a great long-term solution. So when I picked out a 4-piece shelf set, we used the smallest shelf as a soap holder below the mirror and out of the way of our sink. It was the prefect answer to our problem!
(click on the pictures to shop exact products)
Decorating
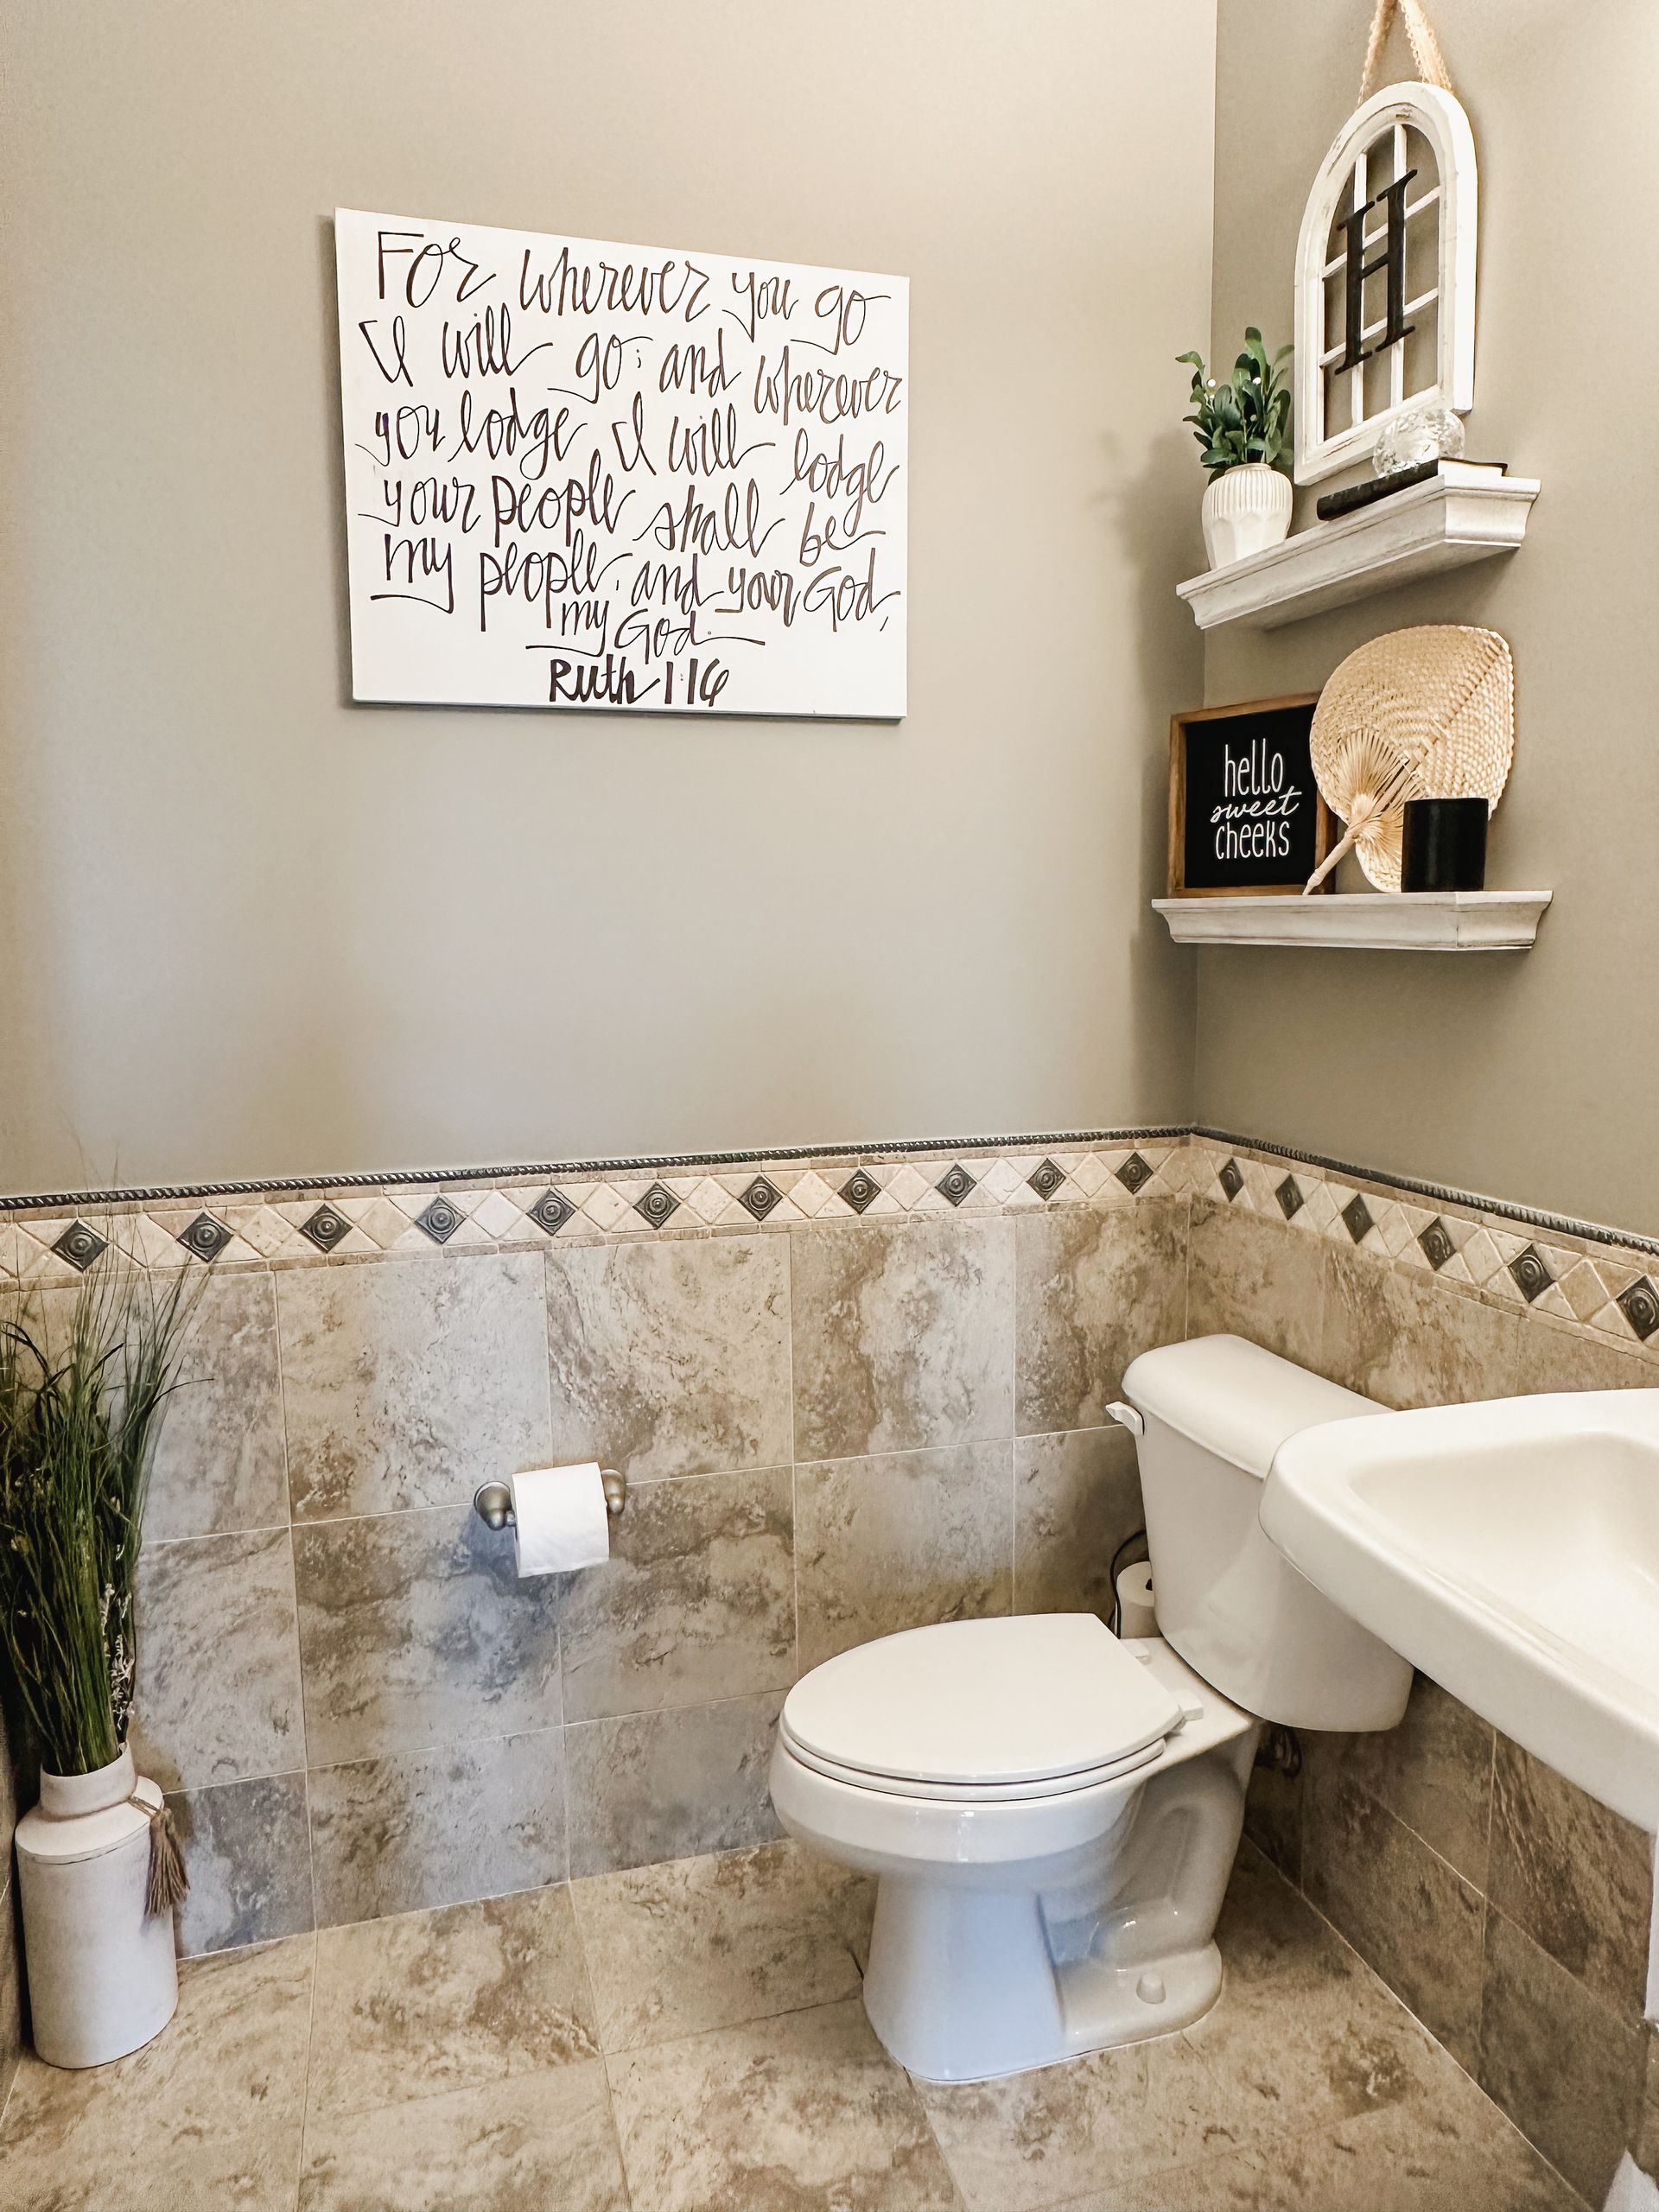
Home decor is such a personal choice for everyone. In our old bathroom before we moved, we only had 2 things that adorned our walls: the farmhouse windowpane arch sign with the H for our family name, and a personal piece of art that my friend Lindsey did at our wedding many years ago. I love both items, and really wanted everything to work around them.
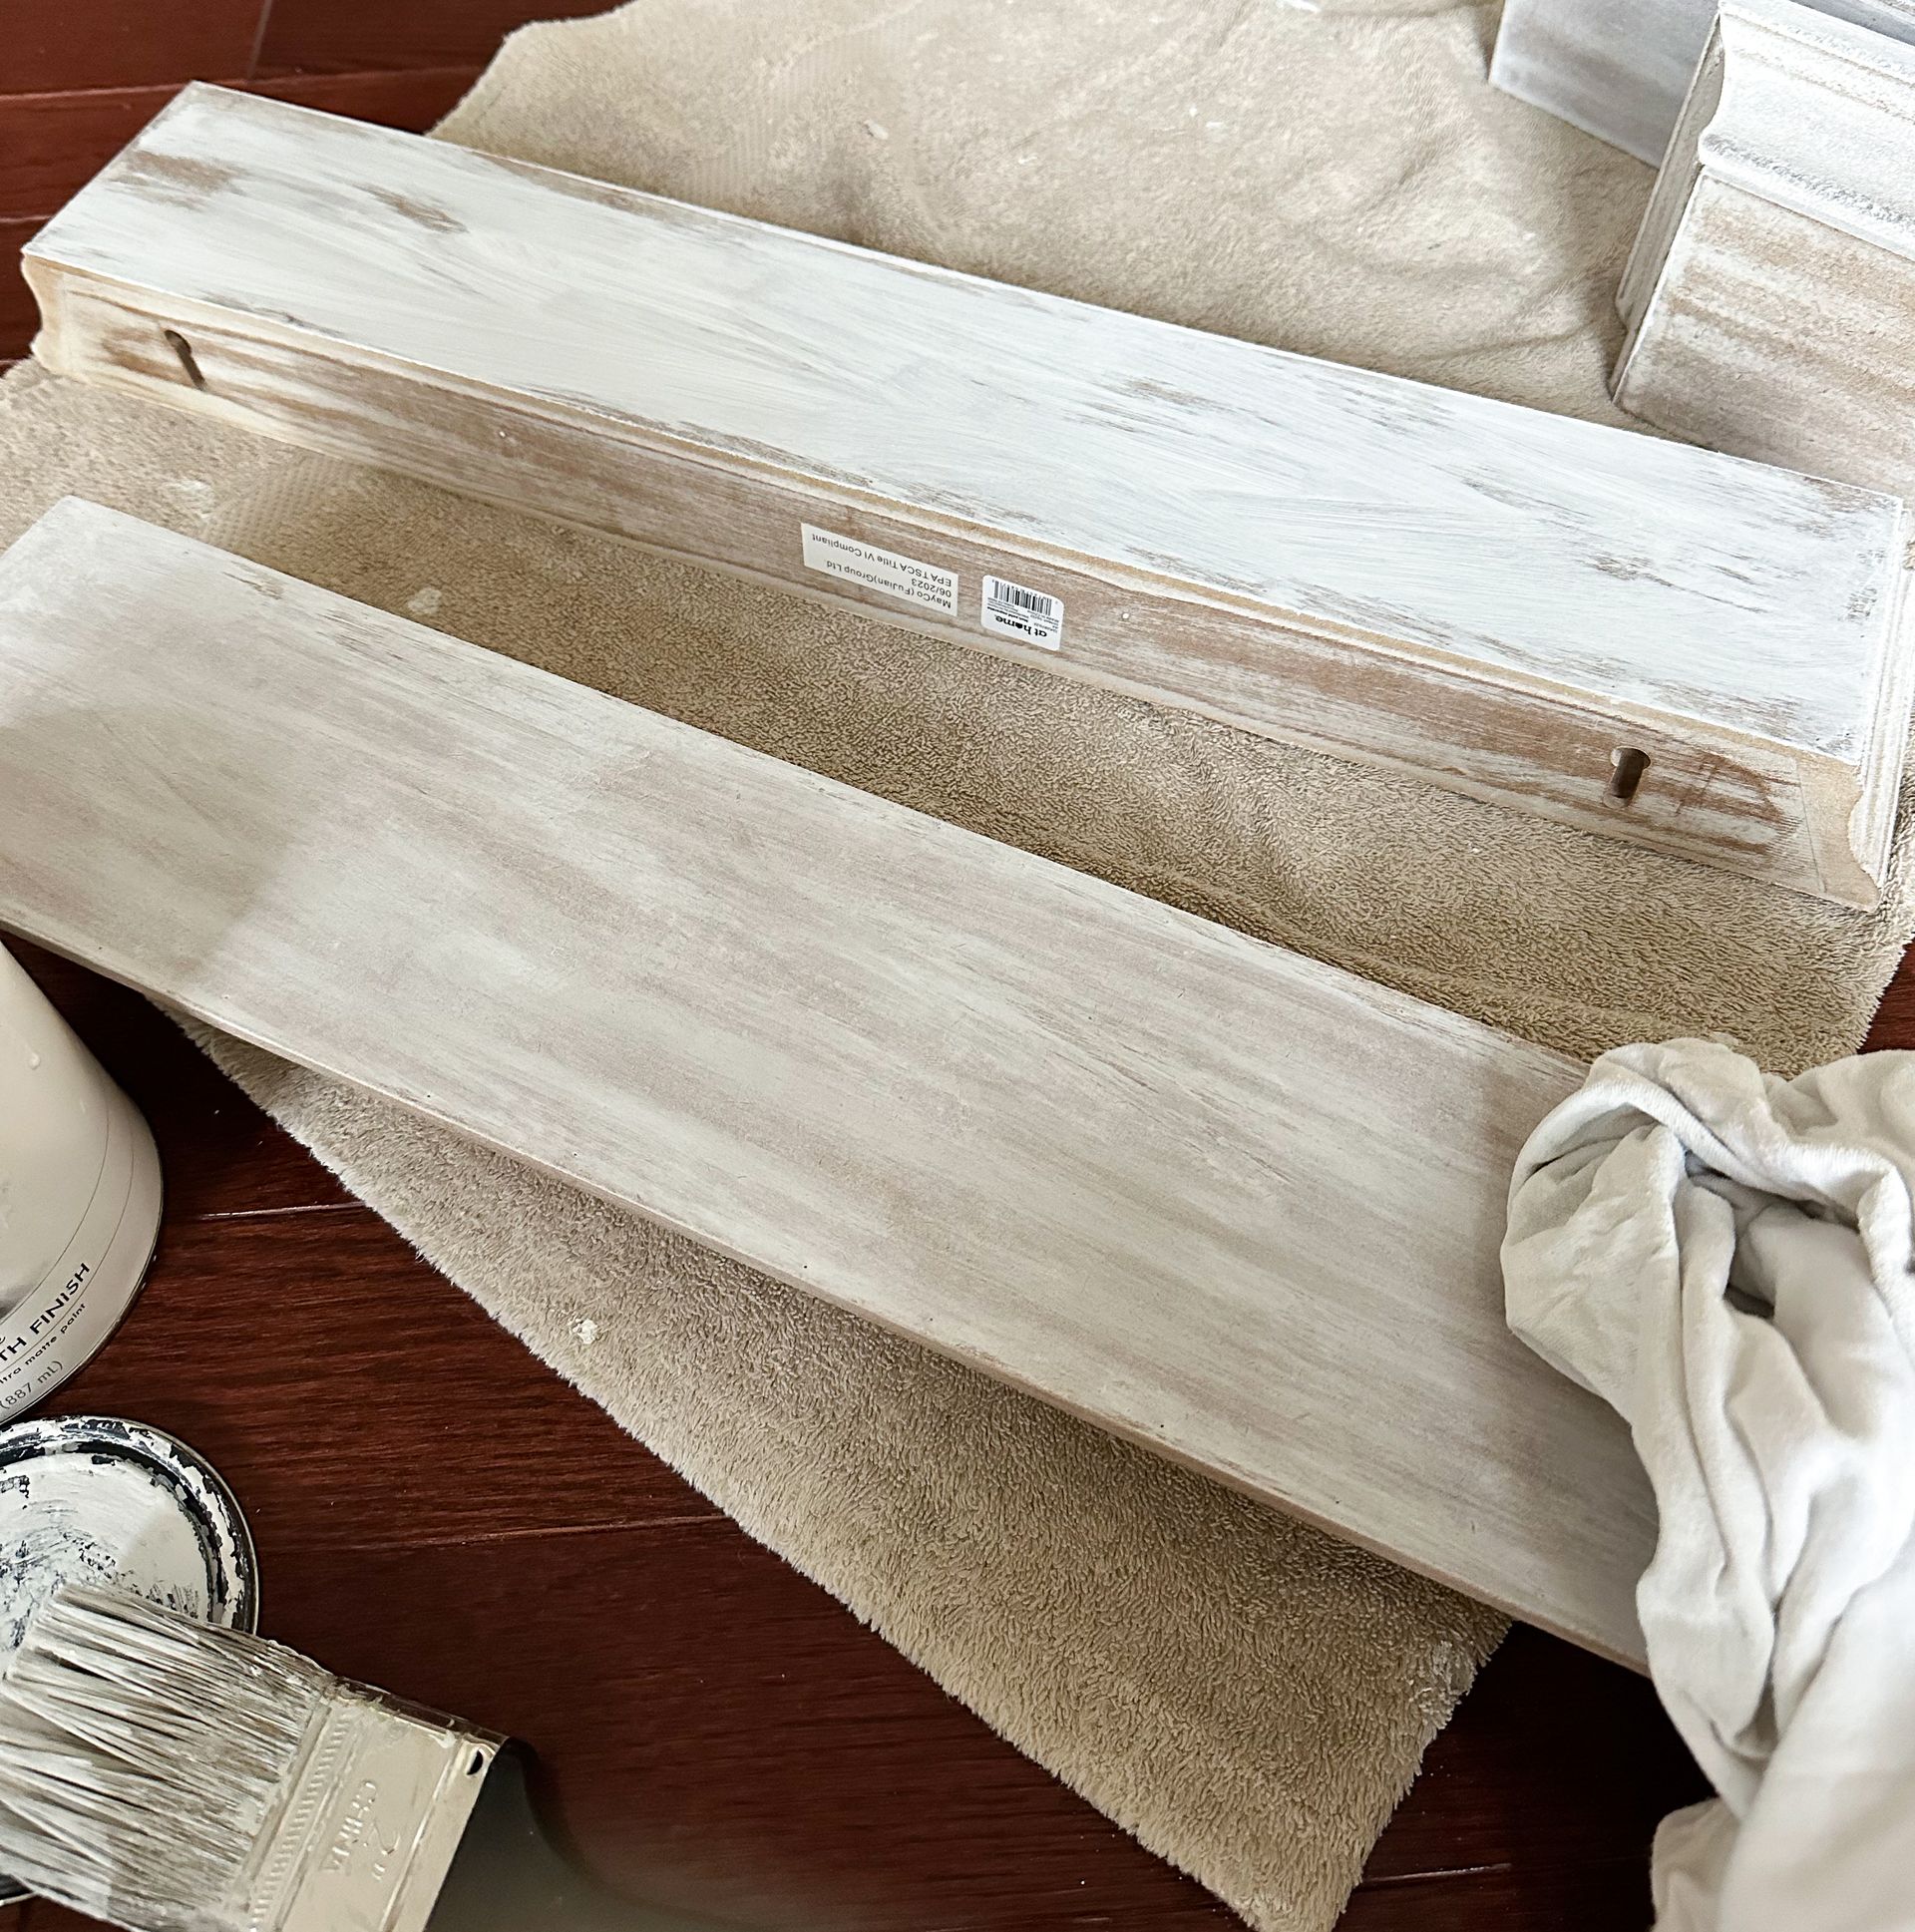
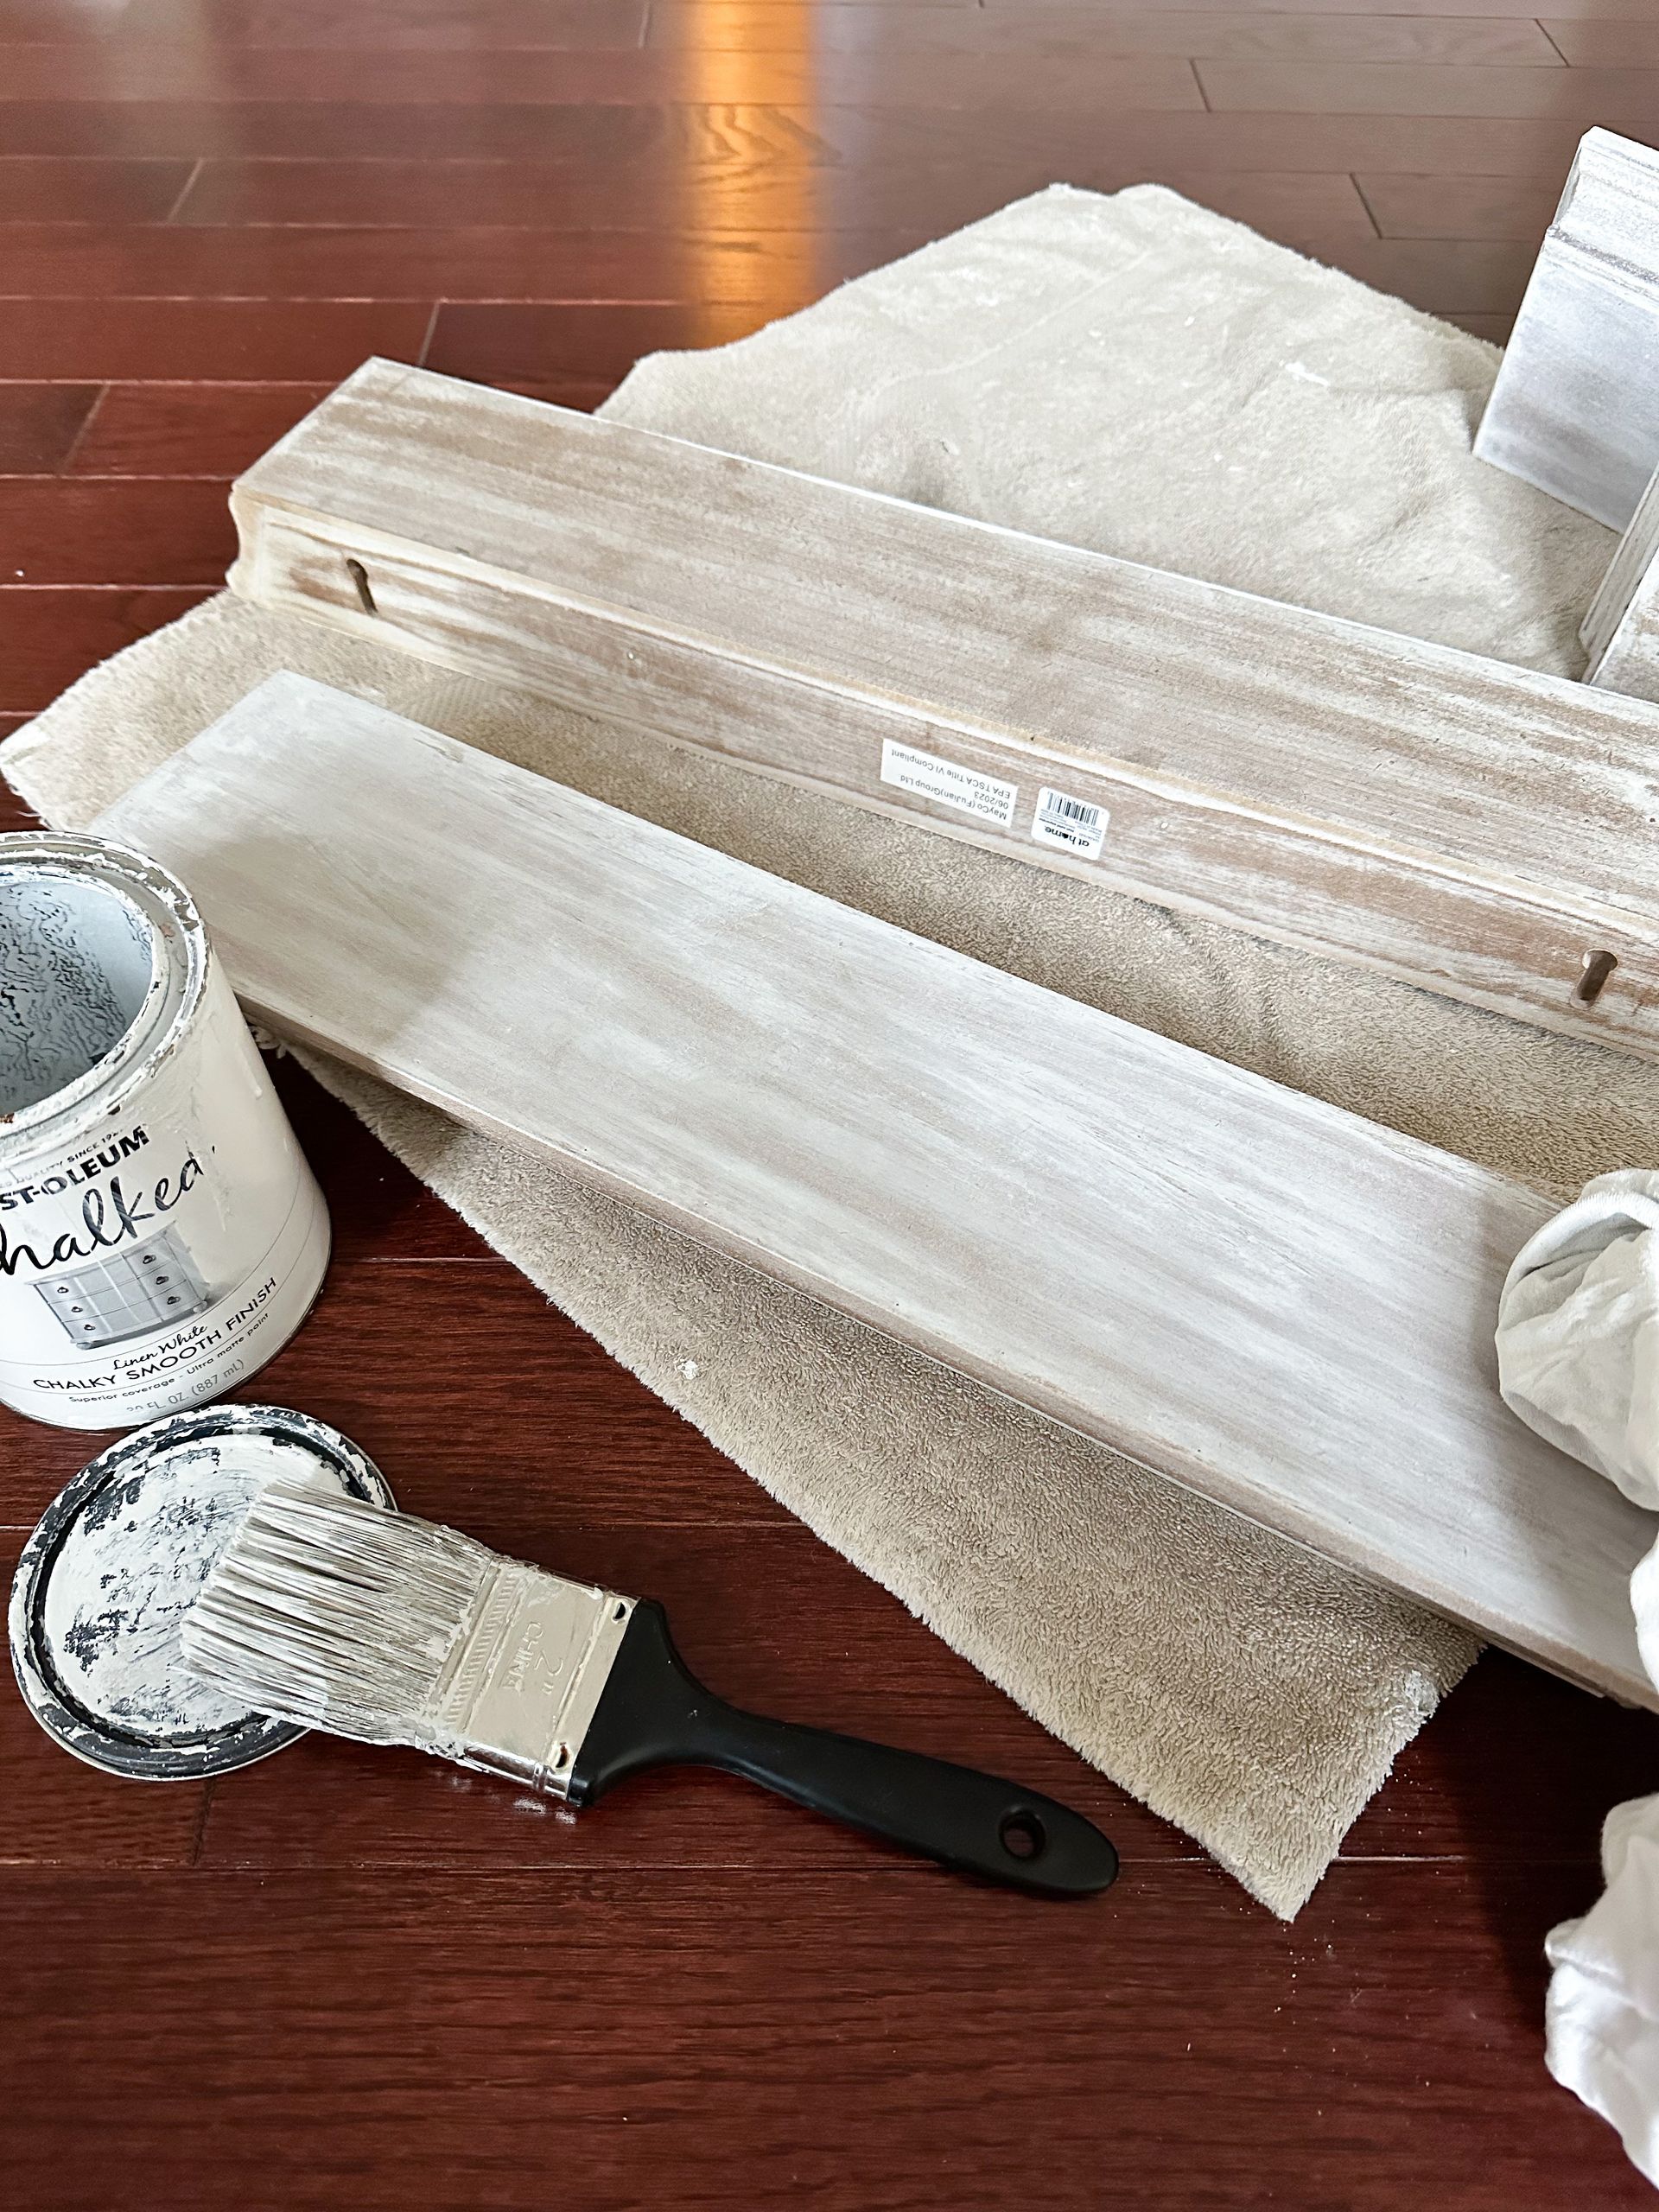
I picked up a set of 4 shelves At Home, and then decided they were just a bit too gray for me and I whitewashed them with linen white chalk paint. I brushed the paint on very lightly with a paint brush and then used one of my husband's old T-shirts to wipe each side down to the exact shade of distressed white/gray that I was looking for. They turned out absolutely perfect!
In the first picture you can see how I brushed the paint on and the amount I used. The distressed gray still comes through a tiny bit with the white on top. In the second picture you can see what the final product looks like after I wiped the paint to get the right texture, and what the shelf looked like before I whitewashed it.
After the shelves dried, my husband hung the largest two above our toilet, and the smallest one near the mirror for our soap.
Then it was on to the decorating! I hung our farmhouse windowpane above the top shelf, and I love how it matches the mirror. I found the Hello Sweet Cheeks sign and black candle at the At Home store. When I was trying to decide on something to fill the space between the sign and candle, I had a sudden thought that maybe the fans my brother and his new wife had at their Colombian wedding would work perfect...it did. And that completed our bottom shelf!
On the top shelf, I put this beautiful Hearth & Hand vase by Magnolia and added her mistletoe foliage to it. Every room needs a pop of green in my opinion...even if it is fake. 😉
And the small black Bible was given to us by our pastor on the day of our wedding. I added a Swedish vase that my mother-in-law gave me when we first left Minnesota- it hadn't yet found a permanent home and this just might be its final resting place!

We put the Bible verse sign back in it's original place. The black letters and white canvas look perfect with the rest of our decor. And if you're interested in an original Lindsey print (she handwrites the letters!) You can shop her prints on Etsy at Palmberg Print.
Finally, I knew I wanted something in the corner of the room to pull everything together. I found a white metal vase and natural grass At Home, and after putting it all together I was really pleased with the way the green popped in the space.
And that was it! All in all, this project took me about 3 days from start to finish - mostly because shopping with two toddlers takes far more time than you would think it would...
When we put the last item into place my husband and I just stood there and looked at it all for awhile. I love the feeling you get from a job well done and a project completed.
Click on any of the pictures to shop exact products, or very similar items. And if you find this helpful, leave a comment!
After
Happy painting, decorating, renovating, and DIYing!
With joy, Jessica
Please note that this blog post includes affiliate links from Amazon. If you do choose to purchase something, I may earn a small commission – at no additional cost to you. All thoughts and opinions expressed in this post are entirely my own. Thank you for your support!


Follow along
For encouraging words and to read what the Lord is saying to me lately